How to Enable the Message Automation Option on Google Business Profile? 🚀
The world today has witnessed the increased involvement of technology in people’s lives. One of the most important factors for success in any business is the communication of it with its customers. The capability of direct engagement with customers via Google Business Profile is extended with the messaging feature within the profile. In this tutorial, you will learn how to activate, use and understand the Message Automation Option on your Google Business Profile.
Understanding Enable the Message Automation Option on Google Business Profile💬
Google Business Profile messaging tool enables businesses to message their customers regarding the queries which eases the response and support process. By doing so, businesses have better engagement and ease of communication.
This part will focus on the first steps of configuring activity aimed at messaging on Google Business profile, making sure you can effectively use this option for contacting your clients.
Step 1: Access Your Google Business Profile
To begin, you must access your Google Business Profile. Ensure you have administrative rights to make changes. Once logged in, navigate to the main dashboard where you manage your business information.

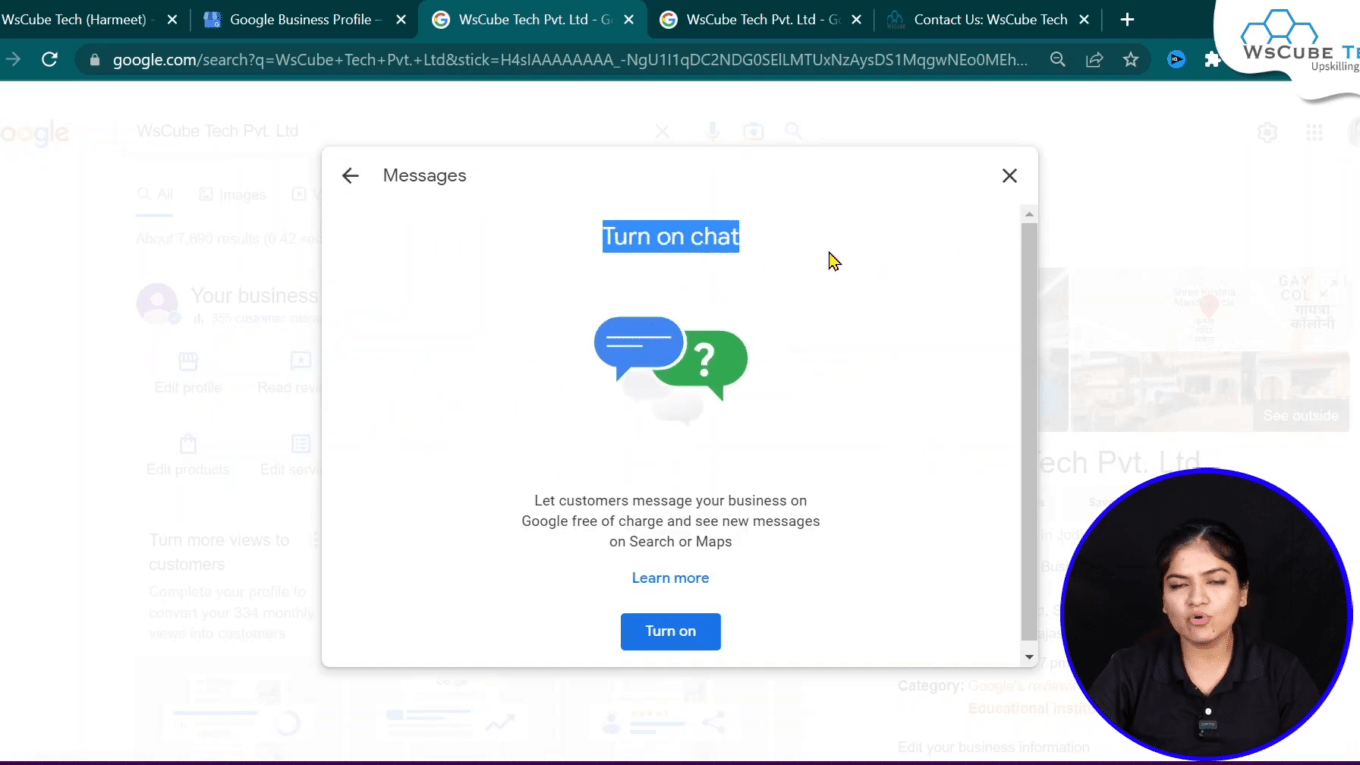
Step 2: Enable Messaging
On your dashboard, look for the messaging option. If it’s not enabled, you will need to turn it on. Click on the appropriate button to activate the messaging feature.
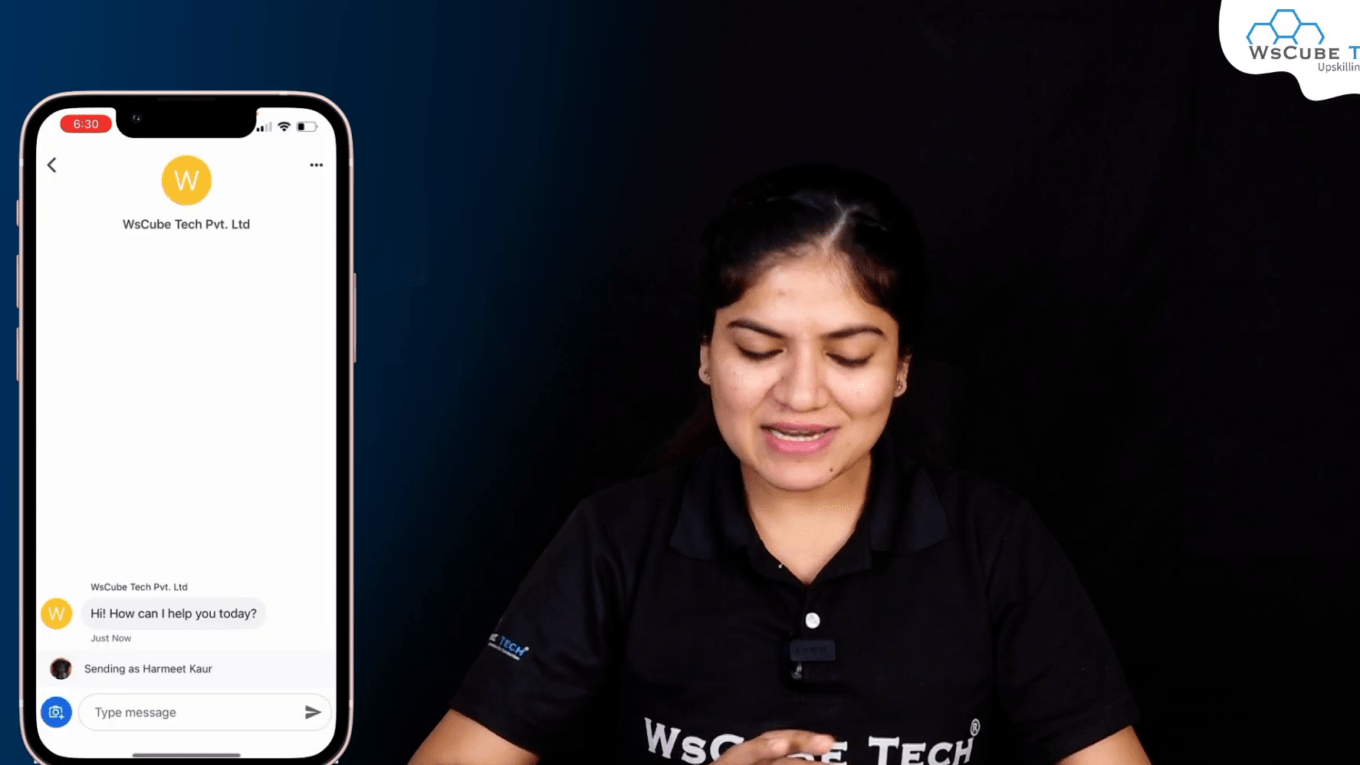
Once enabled, you will receive notifications whenever a customer sends a message. This feature is crucial for maintaining timely communication.
How to Manage Incoming Messages :Enable the Message Automation Option on Google Business Profile📥
After enabling messaging, the next step is to manage incoming messages effectively. This section will provide insights into how to check messages and respond to customers, ensuring no inquiry goes unanswered.
Step 1: Check Your Messages
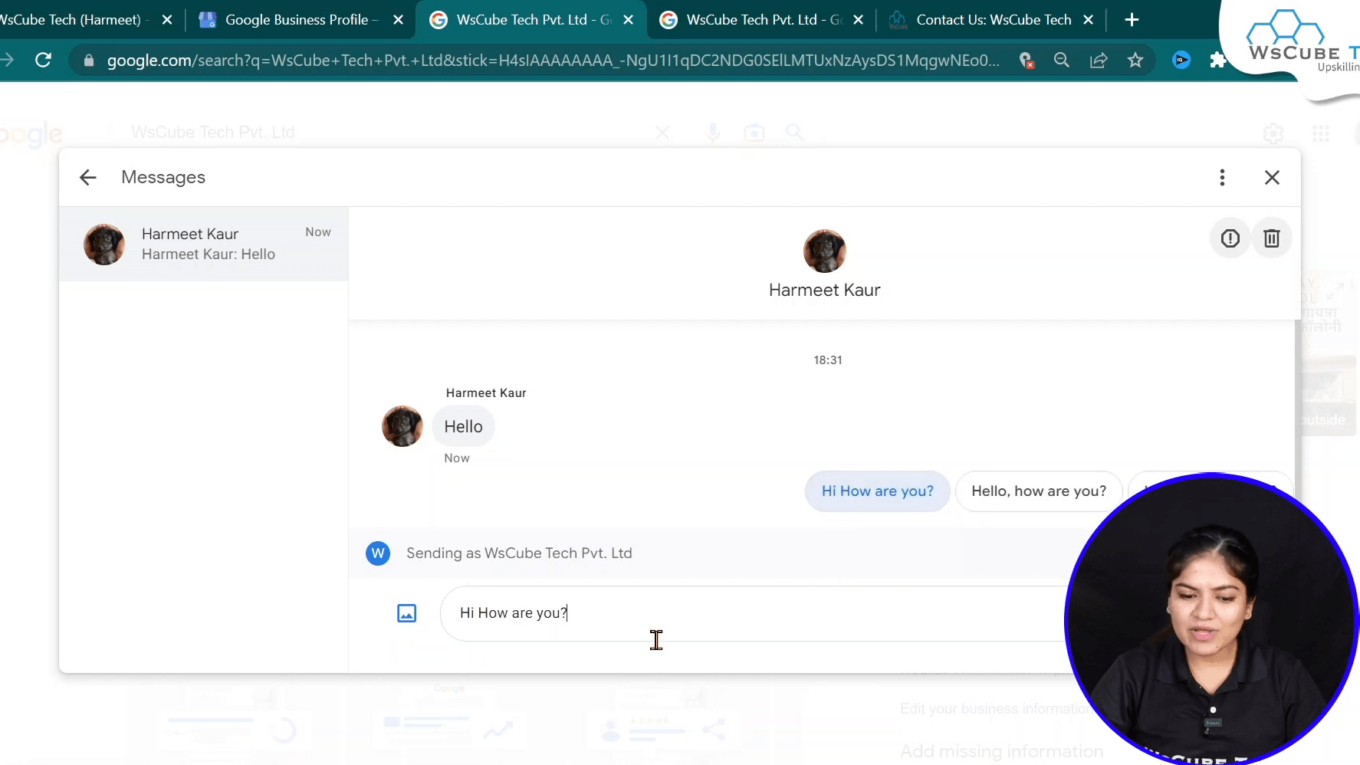
When a customer messages your business, you will receive notifications on your dashboard. You can click on these notifications to view the messages.
The messages will appear in a chat format, allowing you to respond directly. Make sure to regularly check your messages to maintain customer satisfaction.
Step 2: Responding to Customers
When responding to customers, you can type your messages directly in the chat box. For instance, if a customer sends a greeting, you can reply with a friendly message.
This feature not only enhances customer experience but also allows for quick replies, improving overall engagement.

Utilizing Quick Replies for Efficiency ⚡
To further enhance your messaging strategy, consider utilizing quick replies. This feature allows you to set predefined responses for common inquiries, saving time while still providing excellent customer service.
Setting Up Quick Replies
Access the quick replies settings in your Google Business Profile. Here, you can create responses for frequently asked questions or common customer interactions.
For example, if customers often ask about business hours, you can set a quick reply that provides this information instantly.

Benefits of enable Message Automation Option on your Google Business Profile 🌟
Implementing the messaging feature on your Google Business Profile comes with numerous advantages that can significantly benefit your business. Here are some key benefits:
- Improved Customer Engagement: Direct communication fosters a stronger relationship with customers.
- Increased Conversion Rates: Quick responses can lead to higher conversion rates as inquiries are addressed promptly.
- Enhanced Customer Experience: Customers appreciate easy access to support and information.
- Valuable Insights: Analyzing message interactions can provide insights into customer preferences and concerns.
Best Practices for Enable the Message Automation Option on Google Business Profile 🛠️
To maximize the effectiveness of your messaging feature, follow these best practices:
1. Be Prompt in Responses
Timeliness is crucial in customer service. Aim to respond to messages as quickly as possible to show customers that you value their inquiries.
2. Personalize Your Messages
Whenever possible, personalize your responses. Addressing customers by their names and acknowledging their specific inquiries can create a more engaging experience.
3. Monitor Your Messages Regularly
Allocate time to read messages and get back to them in a day. Checking messages at regular intervals makes certain that you do not miss any message from a customer and also that if there are any urgent messages, they can be attended to relatively quickly.
4. Use Automated Replies Wisely
Automated replies are invaluable when it comes to answering customer inquiries but do not make them the only means of communication available. They should be used for answers for which the clients do not require direct contact with a representative though direct contact should be made whenever necessary.
5. Keep Your Information Updated
Make sure that all of the information related to your business, especially its workings hours and what services it offers, is clearly posted and correctly stated. Misunderstanding from the client’s side is minimized and customer confidence is improved.
Conclusion : Enable the Message Automation Option on Google Business Profile🎉
Activating the messaging option on your Google Business Profile is one of the simplest, yet most effective, features in terms of improving client engagement. This guide explains how to activate, control, and utilize messaging in order to help you provide your customers with a better service.
Good communication contributes to increased satisfactions from your customers and respects from them too. Harness this feature in order to engage your target audience and maximize your returns.
